Vintage Kitchen Cart

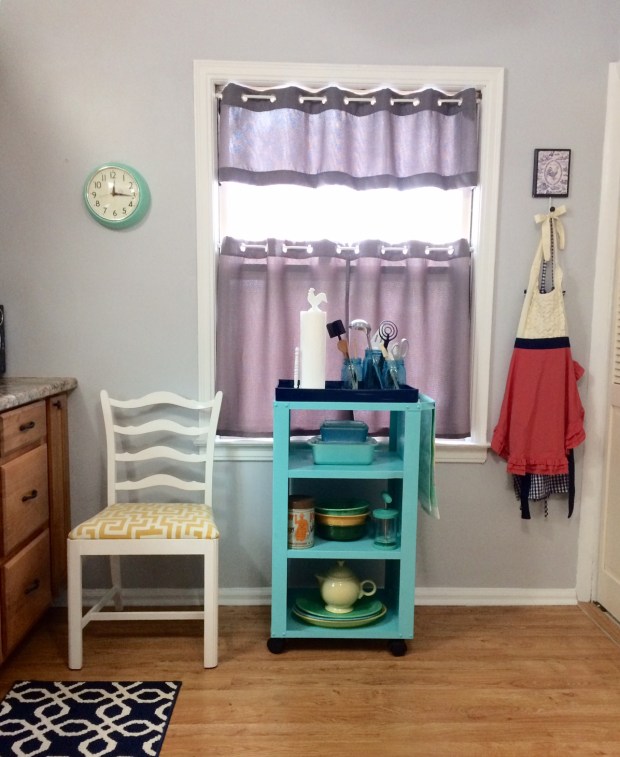
I’m not sure if it’s the norm for the previous owners of your new house to leave things for you, including handwritten notes and detailed instructions for how things around the house work, etc., so I’m pretty sure I hit the jackpot with my previous owners.  The previous owners of my home did all of the above, and then some, so I felt perfectly welcomed and adjusted in my new place upon moving in.  And, what would probably have been trashed by anyone else has now become one of my favorite pieces in my kitchen: a vintage metal cart.  Found at home stores for around $100.00, I’ve been seeing these metal carts on wheels quite a lot lately, and just couldn’t justify paying that much for one, and luckily I didn’t have to.  In my basement laundry room I found this warped, rusty gem.

The weekend before I moved into my house (when my mom and I did about 15 projects in 2 days), we dusted the rust off the cart with a metal bristled brush, removed the warped and stained wooden top, taped off the wheels and spray painted the cart the most perfect vintage hue of turquoise.  As soon as my dad saw the cart, he announced that he wanted to get a piece of marble or corian to replace the wooden top.  While he works on obtaining that, I’ve simply placed a cute tray atop the cart and it’s working out great.  I currently have the cart filled with Fiesta ware pieces and Mason jars filled with cooking utensils, but I’ll probably swap out what’s in the cart several times each year.  As you can see from the first photo in the post, the cart also works great for granola displays at stores, too. 😉

Supplies Needed:

metal bristled brush
painter’s or masking tape
spray paint ($8 for two cans) – insert color and brand


new-kitchen

Kitchen Before & After

Of all the rooms in my new house, I have to say that my kitchen is my favorite room.  To be fair, a kitchen in any house is probably always my favorite room, but I think my kitchen is especially warm and inviting.  When I first moved in, though, the kitchen was a little too warm for my taste, with a monochromatic color scheme of honey oak cabinets, floors, peach walls and terra cotta trim and yellow tinted light bulbs.  After doing my research online and especially on Pinterest, and summoning my high school art class knowledge of the color wheel, I realized that the overly warm tones of the honey oak woodwork could be easily offset and calmed with a fix as simple as changing the paint color to something from the opposite side of the color wheel.  With two coats of a light grey hue on the walls, and painting the trim white, and changing the light bulbs to “daylight,” my kitchen was transformed.  The honey oak cabinets no longer looked so orangey, and the cool grey color actually made the room look more warm and inviting.  The grey walls made such a difference with the cabinets that some people thought I bought and installed new kitchen cabinets, and I took this feedback as a win!

img_6583

The door to my basement:  As you can see from the photos, at some point my dad and I decided to start peeling paint off one of the doors in the kitchen.  This door is directly across from my backdoor, hence the very first thing I see when I walk into my house.  There were several layers of paint on everything in my house, the doors included, so once we got a spot started, the paint peeled off pretty effortlessly with my fingers.  Although it seemed easy enough, I quickly realized this was not a weekend project I could finish on my own, and should probably be completed by a professional.  So I called my furniture refinished (yes, I have a “guy” who refinishes furniture) and asked him if he’d be interested in stripping a door for me.  Of course, he said, and I dropped the door off a couple of weeks later.  By the end of the weekend, and a couple of phone calls later, my refinisher decided to leave the panels of the door painted white, and I think the door turned out beautifully.  I couldn’t be happier with my custom, original door.  Now I want to strip every door in my house, of course.

kitchen-door

Framed flour bags:  I bought a handful of old flour bags from a local mill at a garage sale almost four years ago for $2/piece, and after finding the perfect frames for them had them hanging up above my bed in my apartment.  The kitchen is a much more appropriate setting for the flour bags, and the colors couldn’t be more perfect for the space.  I love the way the three frames look stacked on the narrow wall.

new-kitchen

Turquoise kitchen cart:  There’s a story behind this adorable cart that warrants its own post, so check back soon for the story!