Sweet Potato Hash

I recently came across a half-forgotten bag of sweet potatoes in the veggie crisper drawer of my fridge (the drawer is not clear and therefore typically empty for this very reason).  To my surprise, the potatoes were in good shape so I immediately felt the need to make something with them.  Always looking for an excuse to add a fried egg to a recipe, I decided to make a hash of sorts with the sweet potatoes and anything else I had on hand in my fridge.  The result was simple, but delicious, and something I’d make again for breakfast (this recipe was actually made for dinner).

What I used:
3 small sweet potatoes, peeled and cubed
½ purple onion, chopped
1 roll breakfast sausage (I used traditional, but you could use the hot & spicy or maple flavored)
olive oil
salt and pepper
2 eggs

How I made it:
I crumbled the breakfast sausage and cooked it over medium high heat in a frying pan on the stove.  While this was cooking and I was occasionally continuing to crumble the sausage, I cubed up my peeled sweet potatoes and chopped the purple onion.  Once the sausage was fully cooked I transferred it to a paper towel lined bowl.  In the same frying pan that I cooked the sausage in, I added the cubed sweet potatoes and cooked on medium high heat to get a golden brown crust.  Because the sweet potatoes were cubed, they don’t take very long to cook through.  Once the potatoes were browned I added the chopped purple onion (I waited to add these because I didn’t want them to be completely overcooked).  When the sweet potato cubes were fork tender, I added the sausage back to the pan to heat everything back up together and fried 2 eggs over easy in a small sauté pan.

Over-easy is the only way I’ve ever known how to prepare a fried egg and I think it’s the absolute best way to prepare such an egg.  Just add your egg to melted butter over medium heat, let it cook like you are making a sunny-side-up egg, add salt and pepper to the yolk side, and once fully cooked on the bottom, flip once and turn the heat off completely.  Allow the second side of the egg to warm through and just become set.  The result:  a runny yolk in a perfectly cooked fried egg.  Served in a Fiestaware deep plate, I topped the sweet potato hash with the over-easy egg.  Once cut, the runny yolk of the egg ties the entire dish together.


Apple Chicken Chili

Apple photoIn my ongoing effort to create more blog posts, I have decided to share recipes that my friends have requested of me. I’m hoping these posts will inspire me to create some more original posts, too.

It’s finally fall and the month of September marked not only apple season and everything pumpkin spice, but the commencement of my beloved euchre club. I hosted the season opener this year and made a stand-by Rachael Ray recipe: Apple Chicken Chili. It’s a white chicken chili with, you guessed it, apples!


what I used:

¼ cup extra virgin olive oil
2 pounds ground chicken (the recipe calls for chicken tenders cut into ½ inch thick pieces, but I hate touching raw chicken and I like the consistency of the ground chicken in chili better than the larger chunks)
4 teaspoons chili powder
2 teaspoons ground cumin
1 or 2 teaspoons curry powder (I add this in, so it’s completely optional)
salt and pepper
2 apples, cut into ½ inch cubes (any apples you have on hand or your favorite baking apple variety)
1 yellow onion, chopped
4 tablespoons butter
¼ cup flour
2 cups chicken broth
¾ cup milk (I always use whole milk)
2 (15 oz each) cans pinto or white beans, rinsed
2 cups shredded Monterey Jack cheese
sour cream, for serving

how I made it:

In a large stock pot or Dutch oven, heat half the oil over medium-high heat and cook the chicken seasoned with the chili powder, cumin, curry powder, salt and pepper. Once cooked through, transfer the chicken to a bowl off the stove.

In the same pot you cooked the chicken in, heat the remaining oil over medium heat and add the apples and chopped onion. Cook until just softened (about 5-6 minutes). Add the cooked apples and onions to your chicken bowl.

In the same pot you cooked everything else in, melt the butter over medium-low heat and whisk the flour in for 1 minute (until the raw flour smell is cooked over and it smells nutty). Whisk in the chicken broth and milk until it thickens (about 3 minutes). Add the cooked chicken, apples, onions and the rinsed beans to the sauce and bring to a simmer. Stir in the cheese right before serving.

Top with sour cream and serve. I made this about an hour before my guests arrived and left the heat on low, and stirred the chili frequently before actually serving it.

Basil Pesto

I have been looking forward to making pesto over pasta for a summer dinner ever since I planted my garden in late May.  I have made pesto before, of course, but there’s nothing quite like making dinner with ingredients I grew myself (right in my own backyard).  Once my basil plant had grown tall enough to require its own short stake in my garden, I picked a couple handfuls of beautiful green leaves and pulled out my food processor.  I don’t remember the first time I made pesto and I don’t remember if I used a recipe but for people who enjoy cooking (and I can’t speak for everyone), I feel there are certain things we intrinsically understand how to make.  For me, pesto is one of those things and (let’s be honest) I can probably trace my “intrinsic” understanding back to the countless cooking shows I have watched since I was a little girl.  Basil + olive oil + garlic + pine nuts + Parmesan ­= pesto.

what I used:

2 handfuls freshly picked basil leaves (stems removed)
1 garlic clove, peeled (use 2 if you really LOVE garlic)
1/4 cup Parmesan cheese
1/8 cup pine nuts (I think I will use 1/4 cup next time)
2-4 tables. Extra virgin olive oil
coarse sea salt
1/2 bag Al Dente egg fettuccini, cooked al dente (of course)

how I made it:

Bring water that has been salted liberally to a boil.  As the directions on the bag of pasta instruct, cook the pasta for 3 minutes (I actually cooked mine for 4 minutes, and was very happy with the result).  Once the pasta is drained, I drizzle olive oil on it and toss to prevent it from becoming a mass of pasta.

Using a food processor (I have used a blender in lieu of a food processor before and it works, but it’s nearly impossible to get the finished pesto out of the blender pitcher), mince the garlic by itself until it’s completely minced and evenly coats the bowl of the processor.  Add in the pine nuts and Parmesan and process until a paste forms.  Add in the basil and pulse a couple times to chop it up.  Stream in the olive oil while the processor is turned on.  I like a saucy pesto so I tend to add more oil than most people probably do, so add as much or as little olive oil as you like.

All you have to do now is remove the sharp blade out of the food processor without cutting yourself and spoon the pesto over your pasta!  If you have a few cherry or grape tomatoes from your garden they are a delicious addition to the pesto and pasta, just cut in half and add to the bowl before serving.

Blueberry Lemon Crumb Bars

This is an ode to my dear friend, Jocelyn.  I don’t think I’ve ever met anyone who loved dessert in the form a bar more than her.  In fact, before I met Jocelyn I didn’t realize an appreciation for dessert bars existed.  For some reason, I also associate summer time with Jocelyn, so this was a natural fit.

From a baker’s perspective (this baker’s perspective anyway) creating a bar is a lot like making simple cookie dough without the hassle of scooping and baking several cookies – you just throw the dough onto a sheet pan and when it’s done and cooled all you have to do is cut into little squares or rectangles and the bars automatically look absolutely adorable.  So, I guess my secret is out of the bag: I like to make dessert bars because they are easy.  Bars also tend to contain layers and fruit components, which is always impressive.  I will admit that I use a ruler and straight edge to measure my bars before cutting them with a sharp knife that gets cleaned after every cut to ensure that each bar looks perfect, but they are still easy to make.

Here is my very “summery” dessert bar recipe that was adapted from a random promotional Kraft foods magazine and won the heart of Jocelyn:

what I used:

½ cup butter, melted
1 package yellow, white or lemon cake mix (whatever I have on hand)
2 eggs
2 tsp lemon zest
3 tbls lemon juice
2 blocks (8 oz each) cream cheese
½ cup sugar
2 ½ cups blueberries (rinsed)

how I made it:

pre-heat oven to 350°.  Line a 13×9” pan (I use a glass baking dish) with foil or parchment paper (enough to be able to pull out of the pan on each side once cooled).

Combine melted butter with cake mix, 1 egg and 1 tbls of the lemon juice.  Press 2/3 of the mixture into the bottom of the lined pan.

Beat cream cheese, sugar, 1 egg, lemon zest and remaining 2 tbls lemon juice with a mixer and pour over the pressed crust.  Top with blueberries and sprinkle the top with the remaining crumb mixture.

Bake for 45-50 minutes, until the center is almost set.  Allow to cool completely on a cooling rack and refrigerate for an hour before cutting into squares (see method above).

I pull the bars out with the parchment or foil onto a cutting board so I have a completely flat surface for cutting and can go to town with the ruler and straight edge.  Wiping a sharp knife with a damp cloth or paper towel between each slice really gives the bars a beautiful presentation and allows the layers to shine through in each bar.

Shrimp Salad with Creamy Lemon Dill Dressing

It’s (almost) spring in Michigan.  While the weather still feels like winter I won’t let the temperature stop me from making spring inspired food.  When the seasons change I like to change what I eat and when spring comes along I am always inspired to make food that I find to be pretty.  I also find myself using more fresh herbs as the weather lightens up.  This shrimp salad is light and full of fresh spring flavors, colors and my all time favorite herb, dill.  This year, as the seasons are changing I have also decided to try to eat healthier foods.  I will always bake tasty treats but for my day to day diet I am challenging myself to make things that are not only healthy for me but taste great.  This recipe is adapted from Cooking Light magazine and is perfect for lunch over mixed greens.  I also think it would be a lovely dish to serve at a ladies luncheon if I were to ever host a ladies luncheon ;).

What I used:

For the dressing:

3 tbls reduced-fat mayonnaise (I actually used regular mayo this time)
2 tbls plain fat-free yogurt (I used plain Greek yogurt)
1 tablespoon fresh lemon juice (I used half a lemon’s worth of juice)
1-2 teas fresh dill (I used a lot)
¼ teas Kosher salt
1/8 teas freshly ground black pepper

For the salad:

½-1 carrot (peeled and I continued peeling the carrot into short shreds after I cleaned the outer layer off)
¼ very thinly sliced red onion
1 ¼ lbs cooked, peeled and de-veined shrimp
1 (15.5 oz) can Great Northern beans (thoroughly rinsed and drained)
mixed greens or arugula

How I made it:

Whisk the ingredients for the dressing together in a large bowl.  Add the rest of the salad ingredients to the dressing and toss together.  Serve on a bed of mixed greens or arugula.

shrimp salad

Brussels Sprouts with Warm Bacon Vinaigrette

Brussels sprouts are my favorite winter vegetable.  Roasted in the oven with olive oil, salt and pepper, those mini cabbages become soft on the inside and slightly crispy on the outside.  I love the extra crispy outer layers of the sprouts that fall off and get toasted, coated in salt.  In the fall I often roast Brussels sprouts along with cauliflower, sweet potatoes and squash and top them with pomegranate vinaigrette, but I love the classic combination of Brussels sprouts and bacon.  I recently ate a winter salad with warm bacon vinaigrette but I didn’t love the wilted greens.  I figured a sturdy Brussels sprout could stand up to a warm sauce and bacon would be a natural complement to my beloved sprouts.

What I used to make it:

about a ½ lb Brussels sprouts
Kosher salt
ground black pepper
extra virgin olive oil
6 pieces of bacon, cut into small pieces
2 tbls bacon drippings
2 tbls apple cider vinegar
½ teas honey
½ teas Dijon mustard

How I made it:

I roasted the Brussels sprouts like I mentioned above, after rinsing and cutting in half on a foil lined baking sheet and tossed with olive oil, Kosher salt and pepper in a 350 degree oven for 15-20 mins.

blog brussels sprouts 2

I cooked the bacon pieces in a cast iron skillet and removed the bacon once cooked onto a paper towel lined plate.  In the cast iron skillet, to the remaining bacon drippings (about 2 tbls) I added the apple cider vinegar, honey, Dijon mustard, seasoned with salt and pepper and whisked until combined and heated through over low to med-low heat.  I topped the roasted Brussels sprouts with the vinaigrette and the cooked bacon.

blog brussels sprouts 3

Linguine with Butternut Squash and Bacon

farmers market collage fall
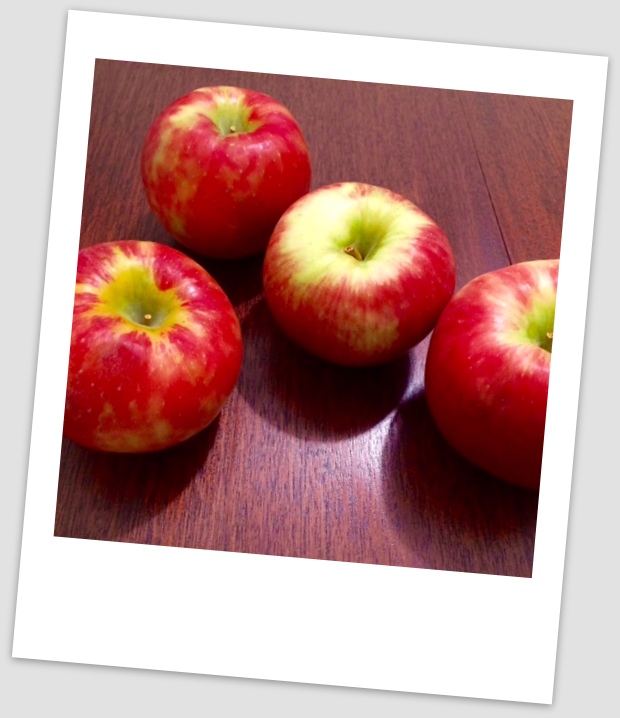
Autumn is my favorite season and this season is easily what makes the Midwest, especially Michigan, so unique.  During this time, the leaves on the trees gradually turn in color from drab greenish hues to vibrant yellow, fiery orange and deep crimson.  A distinct but refreshing chill permeates the air during a short window between mid-September and late October.  Autumn is a pleasant gift bestowed on the Midwest just after a hot summer and before a long, cold winter.

Living in an agricultural community allows me the benefit of savoring local, seasonal produce well past the summer months.  The Owosso Farmers Market (https://www.localharvest.org/owosso-farmers-market-M2520) provides an abundant harvest of fruits and vegetables produced in the community every Saturday morning from May until the very last weekend in October in the heart of quaint, downtown Owosso.

Having recently moved back home to Michigan from Chicago, IL, where farmers markets were open nearly every day of the week in a different neighborhood, I was curious and anxious to check out a small town farmers market.  I have to admit I was very impressed with the amount of vendors at the market, the quality of the produce and the variety of products offered within a two block radius.  Arriving early one brisk Saturday morning, the farmers market was already bustling with vendors and patrons who were equally excited to be at the market regardless of the chilly weather.  Amidst the farm fresh eggs, locally produced honey and beautiful produce, I was drawn to the array of recently harvested squashes and gourds.  I chose a mid-sized butternut squash from a vendor with the intention of making a pasta dish with my delicious fall find.

One of my all-time favorite pasta dishes is fettuccine Alfredo.  A very basic white sauce, full of sharp flavor can be enhanced with the addition of complementary flavors.  Because squash has a mild flavor and soft but rich texture, I decided to add something else to the pasta that was crispy and salty; bacon!

Here’s what I used for the pasta dish:

1/2 lb. linguine, cooked in salted water
1/2 cup (1 stick) sweet cream, unsalted butter
2/3 cup heavy cream
1 1/2 cups freshly grated Parmesan cheese
Kosher salt
freshly ground black pepper
garlic
1 mid-sized butternut squash, peeled, gutted, cubed and roasted with olive oil
3 slices bacon, cooked

Here’s how I made the pasta dish:

First, I tackled the squash.  Broken down into a few steps, taking a whole squash down to a pan full of beautiful orange cubes is really quite simple:

Using a vegetable peeler, peel the outside rind off the entire squash.  Using a large knife, cut the squash in half and then in quarters.  Hollow out the largest end’s centers with a spoon, cleaning out the flesh.  Now you can break down the quarters into flat pieces and cut the squash into cubes.

Once cubed, place the squash in one layer on a baking sheet lined with foil. Toss squash cubes in olive oil, one or two smashed garlic cloves and season with salt and pepper.   Roast at 350 degrees for 20 – 25 minutes.

While the squash is roasting in the oven, fry the bacon in a grill pan or a cast iron skillet.  Set bacon aside.  Bring salted water to a boil in a pot and cook linguine according to package instructions.  In a small or medium sauce pan, melt the butter and add in the heavy cream and cook over medium heat until just bubbling, stirring frequently.  A crushed garlic clove can be added to the cream mixture if desired, while cooking.  If you do add the garlic clove, remove it from the cream mixture after it begins to bubble.  Remove cream mixture from heat and add salt, pepper and Parmesan cheese.  Whisk until the sauce comes together.  Toss with the drained pasta while the pasta is still very hot.  The squash will be done by now and after allowing to cool slightly, add a large spoonful of squash to each serving of the pasta and top with crumbled bacon .

Double Peanut Butter Blondies

During a recent visit to Troy, Michigan I made a stop at The Detroit Shoppe (http://detroitmovesme.com/home.html) in Somerset Collection.  Walking into The Detroit Shoppe was like taking a stroll through time and experiencing each distinct era of Detroit’s history.   Filled with books, nostalgic artifacts and edible goods, The Detroit Shoppe reacquainted me with Detroit’s rich past, exciting present and hopeful future.  From Motown memorabilia to Lions, Tigers and Red Wings gear to Vernor’s and Faygo products, The Detroit Shoppe encapsulated everything that is unique to Detroit.

Along with my purchase of a six-pack of bottled Vernor’s (a rarity) and a book documenting Detroit’s history from 1856 to 1899, I was offered a free jar of Velvet Peanut Butter (http://velvetpeanutbutter.com/).  Never one to pass up free food, I was excited to try not only a new brand of peanut butter but peanut butter that was made in Michigan.   Produced in Livonia, Michigan, Velvet brand peanut butter can be found in stores throughout the state of Michigan and northern Ohio.  The peanut butter is thick, rich in flavor and very crunchy.


Armed with my jar of Velvet Peanut Butter back at home, I figured I would make some peanut butter cookies until I remembered jotting down a recipe for peanut butter white chocolate chip blondies a while back.  Having peanut butter chips on hand as opposed to white chocolate chips, I opted to make the blondies extra rich and decadent, creating double peanut butter blondies.  Adapted from Rachel Allen, here is how I made the blondies:

7 tbls butter, softened
4 ½ ounces AP (all-purpose) flour
1 teas. baking powder
5 ounces crunchy peanut butter (Velvet brand)
6 ounces light brown sugar
1 egg, beaten
1 teas. vanilla extract
3 ounces peanut butter chips

Preheat oven to 325 degrees.  Butter, spray or line 8 x 8 inch square pan with parchment paper.

In a bowl, whisk together flour and baking powder and set aside.

In a large bowl, cream together 7 tbls. butter and peanut butter with a hand or stand mixer until very soft.  Creaming combines two substances slowly in order to fully incorporate both flavors and textures.

Add the brown sugar, beaten egg and vanilla extract and beat until combined.  Add in the flour and baking powder mixture slowly and combine to form a light, fluffy dough.  Finally, add in the peanut butter chips.

Spread the dough in the prepared pan and smooth with a butter knife or spatula.  Bake in the oven for 25-30 minutes or until golden brown and almost firm in the center.  Allow blondies to cool in pan on a cooling rack before cutting into squares and serving.  Dust with powdered sugar before serving if desired.

Cherry Cobbler

Growing up in Michigan, cherries and summertime have always been synonymous.  Unfortunately, the year I decide to move back to Michigan is the year when the state experienced an uncharacteristically warm winter followed by frosts, leaving the cherry capital of the state, Traverse City with a scarce cherry crop.  Traverse City reported losing 90% of the state’s tart cherries and 80% of its sweet cherries in 2012 due to the weather experienced in the early winter season.  I did not let this deter me in my pursuit to capture a quintessential flavor of Michigan summers.

In early August I realized that throughout my baking history I had yet to bake a cobbler of any sort.  In the autumn I often make apple crisp but I typically focus my summer baking efforts on ice cream and cold or room temperature desserts.  I also received some beautiful Grand Haven peaches in early August and the logical recipe to make was peach cobbler.  While researching recipes for peach cobbler I came across a recipe by Paula Deen, a woman who is as synonymous with Georgia as the peach itself and assumed she would be the authority on fruit cobblers.  And an authority she is.  Paula’s Deen’s recipe for cobbler couldn’t be simpler and the baked result couldn’t be fluffier, richer or more satisfying if you added ten sticks of butter.

Adapted from Paula Deen’s recipe for peach cobbler, I came up with a memorable dessert that captures the essence of Michigan summers in every bite!

What I used for the cherry filling:

4 cups cherries, pitted
1 cup sugar
½ cup water
1 tablespoon cornstarch

What I used for the cobbler:

1 ½ cups self-rising flour *
1 cup sugar
½ teaspoon vanilla extract
1 ½ cups milk
1 stick butter

* if you don’t have self-rising flour, you can substitute the same amount of all purpose flour and add ½ teas. salt and 2 teas. baking powder.

For the filling:
Combine the cherries, 1 cup sugar, 1 tbls. cornstarch and ½ cup water in large pot and bring to a boil.  Simmer on medium heat for 10 minutes.  Remove from heat and allow to cool slightly.  The filling can be made in advance.

For the cobbler:
Pre-heat oven to 350 degrees.  Once oven is pre-heated, place the stick of butter in a baking dish (9×9 inch) and allow butter to melt in the oven.  Remove baking dish from oven and set aside.

Whisk together 1 ½ cups self rising flour and 1 cup sugar.  Once combined, slowly whisk in the 1 ½ cups milk and ½ teas. vanilla extract to avoid clumping.  Continue whisking until completely combined.  The batter will be thin.

Pour the batter over the melted butter in the baking dish.  Pour the cooked cherries over the batter (including all of the syrup).

Bake for 35-40 minutes until the top of the cobbler is golden brown.  I place the baking dish on a cookie sheet while baking the cobbler in case any of the juices bubble over.

Allow cobbler to cool as much or as little as you’d like before serving on its own or with vanilla ice cream.